BUYER GUIDE
Tile leveling clips sample inspection checklist: what to check before you accept
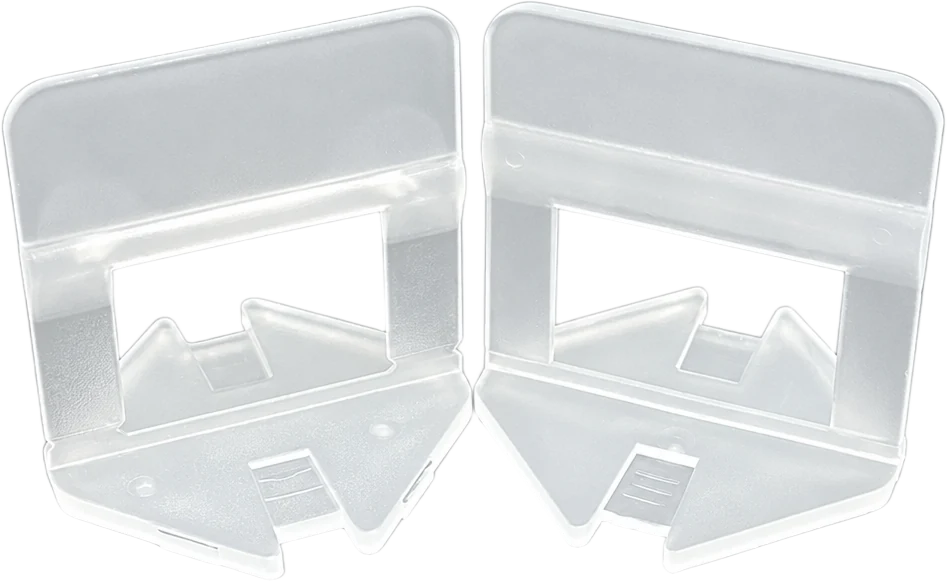
A sample inspection of tile leveling clips settles two things: whether the parts you were sent match the parts you approved, and whether they work with the wedge and pliers you already stock. It does not settle performance claims. So the checklist below measures dimensions, checks appearance, then runs a laying trial, and only then puts a number on the purchase order.
What an inspection can and cannot settle
Two different approvals get confused on the factory floor. Product approval is a decision about the clip itself: its dimensions, its material, the finish of the moulding. Packaging approval is a decision about the bag, the carton and the label. A clip can pass the first and fail the second, and a sample sheet that does not separate the two is how a shipment gets rejected for the wrong reason.
What this checklist does not do is certify performance. No test report sits behind these clips, no certification is claimed, and any figure a buyer needs for a specification file has to be requested and confirmed separately. A clip that measures correctly is not the same as a clip that has been tested to a standard, and an inspection should not blur that line.
Appearance and consistency
Start with the parts as they come out of the bag, before any measuring. Look for flash along the parting line, stringing at the gate, sink marks on the base and burrs inside the window. A burr in the window matters more than a burr anywhere else, because that is the surface the wedge slides against.
Then check consistency rather than beauty. Pull ten pieces at random and lay them side by side: they should be indistinguishable in colour, in the height of the base and in the angle of the legs. A single darker or lighter piece is usually a different lot, and a different lot is the thing that changes how the clip grips.
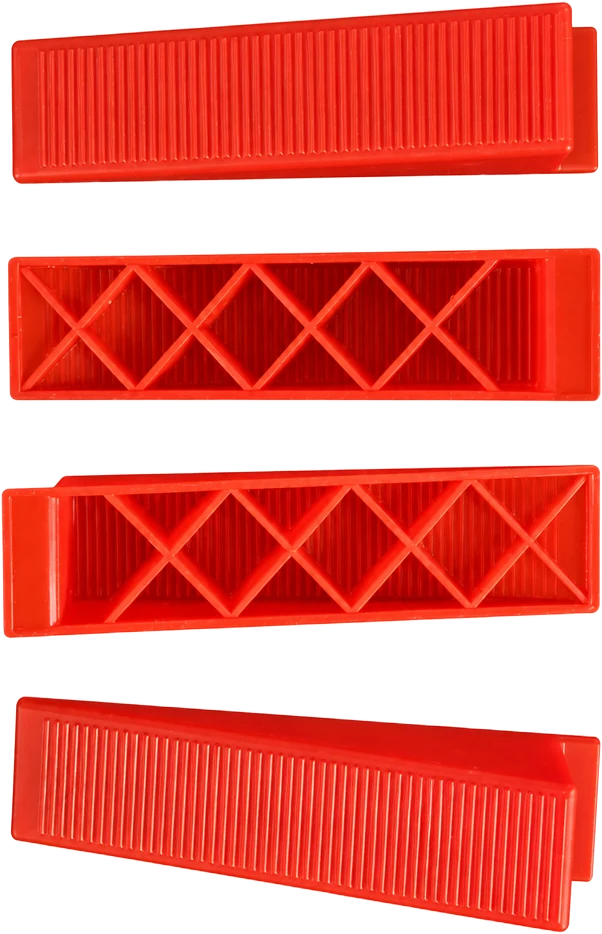
The wedge deserves its own look because it has two faces. One face carries the ribs that grip; the other is a lattice that keeps the part rigid without solid material. Both faces have to be complete. A short shot on the lattice side leaves a wedge that flexes under load, and it will still look perfectly normal from the ribbed side.
Measuring the clip against the approved sample
Measure against the approved sample, not against a catalogue. The figures in the table below are what the mould is built to; the inspection checks that the parts in the bag still sit inside them. Use a caliper on the base and a scale for the weight, and write the readings down rather than judging them on the spot.
Weight is the check most buyers skip and the one that catches the most. Weigh ten pieces together and divide: a spread of a few tenths of a gram across the sample points to short shots, or to regrind creeping into the material. Neither shows up in a dimension check, and both change how the clip behaves under the wedge.
One caution on the numbers. Do not set an acceptance limit after you have seen the readings. A limit written after the measurement will always pass, and the inspection stops being an inspection. Agree the tolerance band when the sample is approved, write it on the sheet, and measure against it afterwards.
| What to check | Value to measure against | Why it matters |
|---|---|---|
| Joint width | 0.5 mm to 3 mm, in 1 mm steps | Sets the grout line the clip holds open |
| Base thickness | 1.4 mm, 1.8 mm or 2.2 mm by series | Sets how far the clip sits above the tile face |
| Base width | 38 mm | Covers the joint without bridging two tiles unevenly |
| Window | 23 mm | Takes the wedge; a tight window will not seat |
| Overall height | 37.8 mm standard, 47 mm on the tall body | Must clear the tile thickness you are laying |
| Piece weight | 1.6 g, 2.6 g or 3.2 g by series | Best proxy for a consistent shot |
Fit between clip, wedge and pliers
A clip that measures correctly can still fail to work, because the fit is a relationship between three parts. The reusable wedges measure 91 mm by 22.5 mm by 16 mm and weigh 5.3 g. Each one has to enter the window, grip, and release without being forced, and the same wedge has to do that in every clip of the same series.
Test the fit by hand before you test it with the pliers. Push a wedge into a clip until it seats: it should travel with light resistance and stop positively. A wedge that slides in with no resistance will not hold the tiles level under load; one that has to be hammered in will distort the clip and open the joint instead of closing it.
The pliers are the third part, and their job is to apply the same force every time. The body is 240 mm long on an adjustable steel mechanism, so the jaws close on the clip rather than on the tile. Check that the jaw faces sit square to the clip and that the mechanism returns freely. A tool that binds pulls the clip off axis, and an off-axis pull lifts one tile edge instead of levelling it.
A laying trial beats a caliper
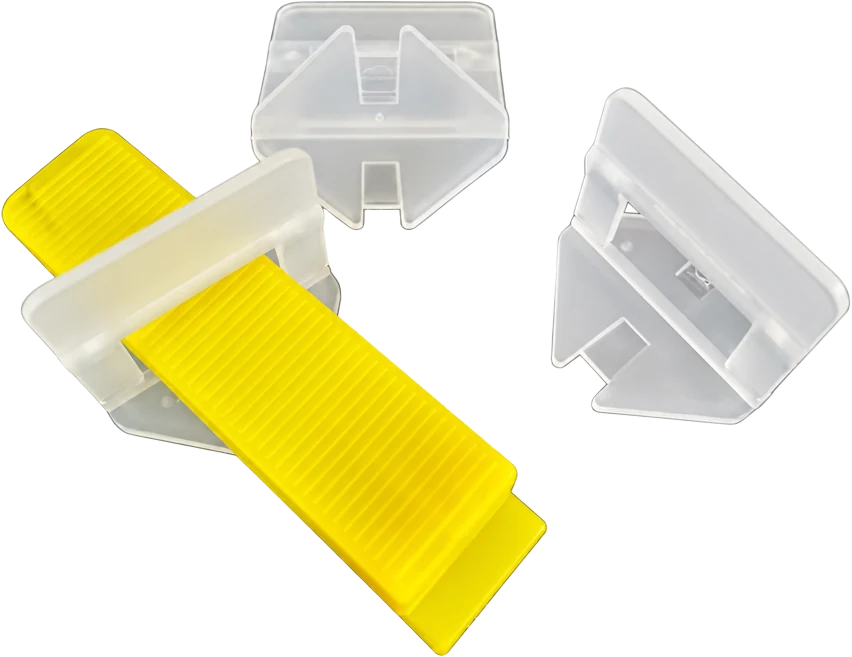
The last check is the one that actually predicts whether the system will work on the job: set three or four tiles with the clips, the wedges and the pliers, on the tile you are going to sell it with. Lippage is judged by hand across the joint, and the joint is judged by eye under raking light. A clip can pass every measurement and still leave a step you can feel.
Two things to watch in the trial. First, the foot has to break off below the tile face without chipping the edge; if it tears above the surface it leaves a stub in the grout line. Second, the wedge has to release without dragging the clip, because a clip that moves on release takes the joint with it.
Set the trial on a board rather than on a finished floor, and keep the board. A photograph of a laid sample is useful, but the board itself is the reference that settles an argument six months later. If the sequence is still unfamiliar, the walkthrough on how to use a tile leveling system covers the order of clips, wedges and pliers on a real floor.
It is also worth reading the installation guidance published by the TCNA alongside this, because most lippage complaints turn out to be installation issues rather than clip issues. An inspection can only confirm that the parts are right; it cannot confirm that they were laid right.
Writing the acceptance into the order
The packing line is where an inspection most often stalls, because the arithmetic is easy to check and easy to get wrong. A carton holds 30 bags of 100 pcs, which is 3000 pcs, and that carton measures 57 cm by 37.5 cm by 33.5 cm. Count one carton by hand at the start of the run rather than trusting the label, and weigh it: a carton that is short of 3000 pcs is usually short of bags rather than short of clips per bag.
Lead time is the other thing to fix in writing. Samples leave within 3 days. A full container takes about 20 days of production before it is ready to load, and the inspection has to fit inside that window rather than after it. Book the inspection date against the production schedule, not against the sailing date.
Which series you inspect depends on what you are laying. The recommended tile clips cover joint widths from 0.5 mm to 3 mm and tile up to 17 mm. The hollow-top clips reach 18 mm of tile on a lighter base. If the joint width is still open, the joint width guide works through which gap suits which format, and it is worth settling before a sample is approved rather than after.
Send the series, the joint widths and the tile thickness you are working to. We will confirm the dimensions and the packing before a sample is sent, so that the sheet you inspect against is the same sheet the factory builds to.
- Approve a signed sample of each series and each joint width, and keep one bag of it.
- Write the tolerance band on the sample sheet before the first bulk run.
- Separate product approval from packaging approval on the same sheet.
- Check the packing arithmetic by hand: 30 bags of 100 pcs gives 3000 pcs per carton.
- Confirm the carton, 57 cm by 37.5 cm by 33.5 cm, before booking space.
- State who carries the cost of a failed inspection, and where it is carried out.
Related pages
- Recommended tile clips
- Hollow-top clips
- Reusable wedges
- Choosing the right joint width
- How to use a tile leveling system
Request a quote
Ask us about this
Joint widths, tile thickness, quantity and destination port are enough for us to quote. Samples leave the factory in 3 days.